
When new parcels are created and brought in via a LandXML file, they are linked with your captured data. You need to relink at least one new parcel to ensure mandatory and optional missed marks are included in the survey. See Missed Marks for more information.
- In order to process mandatory missed marks, make sure that the existing parcels subject to the survey are captured before linking the new parcels.
- When a new parcel has a surveyed definition (boundary dimensions and lines) those vectors need to be captured in the Landonline spatial view, and then linked to the textual information for the new parcel.
- As you view the captured parcels in the spatial display while linking, ensure you have captured the vectors for the defined parcels and, where appropriate, existing underlying lines for balance parcels.
- Pre-validate frequently to identify and correct issues as you go, such as boundary lines and mark linking. See Pre-validation for more information.
What to do
- Select the New parcels icon in the left-hand Workflow control bar, to open the New parcels panel.
The New parcels panel will appear.
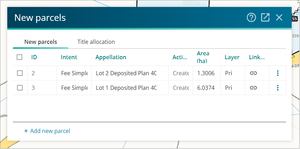
- Select a row to highlight the parcel on the spatial view. If the Link icon is greyed out, this means the parcel is unlinked.
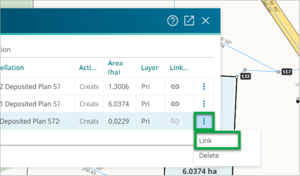
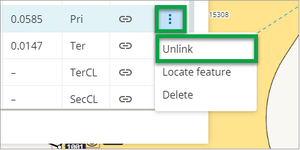
To link or unlink a parcel, use the more options menu (three dots) at the end of the row.


Relink a new parcel
New parcels created by importing a LandXML file will be automatically linked in the dataset. Pre-validation will require at least one of the new parcels to be relinked to ensure the mandatory missed marks process is completed. See Missed marks for more information.
Open the more actions menu (three dots) and select Unlink.
Once a parcel is unlinked, select the more actions menu (three dots) at the end of the row and then select Link.
Closed loops of the relevant boundary vectors will display on the spatial view in red.
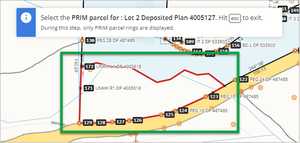
- Click inside a closed loop to select the parcel definition to be linked. When you select a parcel, the entire parcel is coloured yellow.
Select the Link Parcel button to accept the parcel linking.


