
Existing Landonline vectors can be selected from the Spatial Display and added to your survey.
While capturing existing vectors, the From and To marks are automatically captured for each vector.
What to do
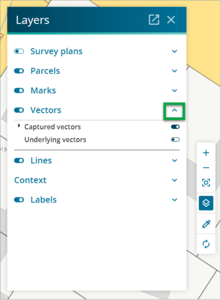
- In the spatial view, click on the Layers icon on the Tools toolbar to display the list of available layers.

- Expand the Vectors layer by clicking on the word Vectors or the arrow symbol to the right.
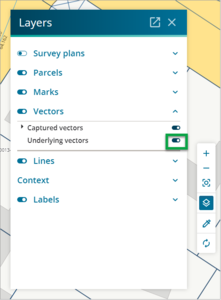
- Display the Underlying vectors by clicking on the slider icon to the right.
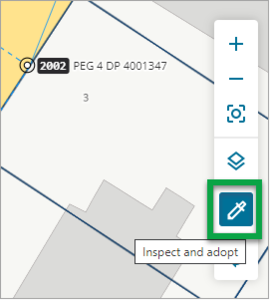
- Click on the Inspect and adopt icon from the Tools toolbar.
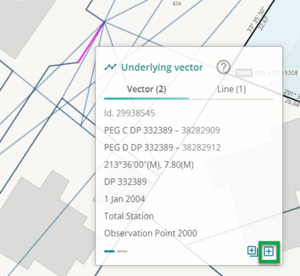
- Click on the desired vector, and a pop-up box will appear. If more than one vector is selected, blue dashes will appear at the bottom of the pop-up box. Click on the other dashes to see details of the other vectors selected.

- If there is also a line selected, you will see a ‘Line’ heading at the upper right of the pop-up box. The number of lines that have been selected will be shown in brackets. Select this heading to see the lines selected.
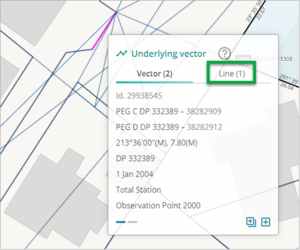
- Once you have confirmed which vectors or lines you want to adopt, select the appropriate icon at the bottom of the pop-up box. The single box with a + in it is the Adopt this vector icon. Click this to adopt one vector or one line.
The stacked-squares icon is the Adopt multiple vectors icon. Click this to select more than one vector or line.
 If you select the Adopt this vector icon, the vector will be adopted and a confirmation message will appear in the top-right corner of the screen.
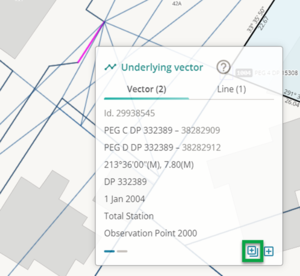 If you select the Adopt multiple vectors icon, a panel will appear on the right-hand side of the screen.
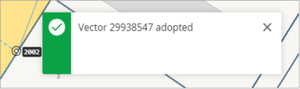
Note: You can select the Adopt multiple vectors icon even if only one vector or line is selected, and then manually select more vectors or lines to adopt.
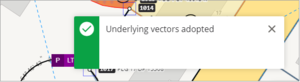
Click the Adopt selected vectors button to adopt the selected vectors.

-
An Underlying vectors adopted pop-up will appear in the top-right of the screen to confirm your vectors have been successfully adopted.
- The vectors will be added to the bottom of the list in the Vectors panel.

- If the marks were linked marks, the To number will show as the existing mark number, e.g. 1005.
Note: In this example, if mark 1005 was unlinked and you adopted your vector, the To mark number would be the next available number, which in this case is 202023. Landonline will automatically show 202023 as a linked mark, but in the spatial view it will be sitting behind mark 1005. This leaves 1005 unlinked and will result in a pre-validation warning. To resolve this issue, you would need to manually change the To mark to 1005 and delete mark 202023.


- Once you have finished adopting your vectors, you can edit the captured vector information for the adopted vector if necessary. You can include a bearing correction if appropriate.


