
Open a TA certification work item
Open a TA certification work item by left-clicking on its Survey number.

The Work item details screen opens.

You will see 5 expandable sections on the left-hand side of this screen:
- Survey details
- TA certification details
- Packages
- Annotations
- Supporting documents
Select the arrow next to a section to open or close it.

The right-hand side of the screen shows details of certificates in the currently selected package. The first package is selected by default when you open the work item.
Working on a work item within 30 minutes of Landonline closing
If you open or are working in a work item with less than 30 minutes before Landonline closes, a warning will display.
The warning appears as an orange border around the work item, with a countdown timer at the top of the screen: Landonline will close in XX:XX.


Once there is less than 5 minutes until Landonline closes, the warning changes to red.


Ensure you save and close your work before Landonline closes for the day to ensure no data loss.
For Landonline availability, see:
Landonline
View Survey details
The Survey details section lists:
- Survey number – the CSD reference number. This is allocated by Landonline and can’t be edited.
- Surveyor reference – if required, this can be edited by the surveyor from the Landonline Survey application.
- Survey status – the current status of the survey, for example Pre-allocate, Approved, Requisitioned, etc. This will change as the survey moves through the approval process.
- Survey purpose – this is determined by the surveyor.
- Surveyor – name of the signing surveyor.
You can't edit any details in this section.

View and edit TA certification details
The TA certification details section lists:
- TA reference
- TA certification status
- Assigned user
- Territorial Authority

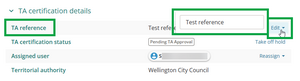
Edit TA reference
The TA reference is entered by surveyor when they create a TA certification request, but you can edit this as needed.
Select Edit to the right of the TA reference. A text-box will appear containing the current TA reference.
- Click anywhere inside the text-box and start typing your new TA reference.
- To save the new TA reference, either:
- click outside the text-box
- press Tab or Enter on your keyboard.

TA certification status
TA certification status shows the current status of the TA certification for the survey.
| TA certification status | Description |
|---|---|
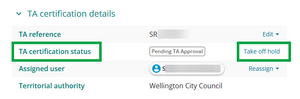
| Pending TA Approval | The Surveyor has notified the TA about the TA certification, but the work has either not been assigned to a TA user, or the assigned TA user has not started working on it yet. |
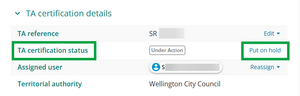
| Under Action | A TA user has been assigned the work and started working on it, but not all packages are signed. |
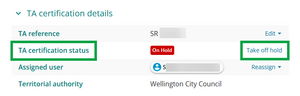
| On Hold | The assigned user has temporarily halted work on the TA certification. |
| Complete | The TA user has signed all packages in the TA certification. |
If you are the assigned user, you can change the status from Pending TA Approval to Under Action, or On Hold.
Once all Packages have been signed, the status will automatically change to Complete.
When you start working on the work item, change the status from Pending Approval to Under Action. Select Take off hold.
To change the status to from Under Action to On Hold, select Put on hold.
To change the status back from On hold to Under Action, select Take off hold.


Assigned user
Assigned user shows the TA user assigned to the work, if the work item has been assigned.

If the work is unassigned, it will show Assign.

You can assign the work item to yourself or another user, or reassign it if it’s already assigned to you.
Select Assign or Reassign – whichever is applicable.
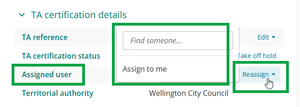
- Assign the work item:
- to yourself by selecting Assign to me.
- to someone else by typing their name in the text-box. Select their name when it appears in the drop-down.

You can assign or reassign work from here or from the TA certification Landing page.
For help with assigning work from the TA certification Landing page, see:
Assign work on different tabs
Territorial authority
This field contains the name of your TA and is entered by the surveyor when they create a TA certification request. You can’t edit this field.

View and create Packages
The Packages section contains the packages the Surveyor created, and a summary of the Certificates within each Package. You can see the status of the packages and certificates here.

The certificates listed in the package change colour as their status changes:
- White – certificate created but not completed.
- Grey – certificate completed and ready to sign.
- Green – certificate signed.
The package that’s highlighted blue in the list is open on the right and displays the first certificate preview. Any additional certificates are listed below the previewed certificate. You can expand or condense a certificate by left-clicking the certificate’s name.

The text fields shown in the certificate preview, for example Plan Number, Approval Date, etc., will be different for each certificate type.
You can also create new packages and edit existing packages or certificates.
For information on how to create packages, and edit and complete a certificate, see:
Work with packages and certificates and complete certificates
For information on signing a package, see:
Sign or unsign a package
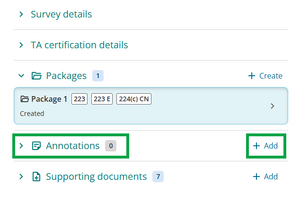
Add or view Annotations
You can add annotations at any stage of the certification process. These will only be seen by TA users at your firm.
Annotations can’t be deleted.
Select the +Add button. A pop-up box will appear.
Click into the Annotation field and type in your annotation.
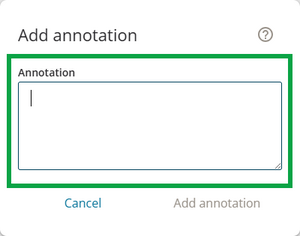
Select Add annotation when you’ve finished.
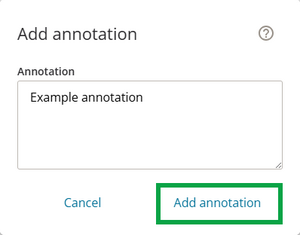
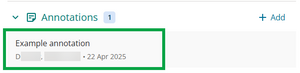
The annotation is listed with the date and name of the user who created it.


View and edit Supporting documents
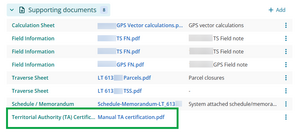
The Supporting documents section contains any supporting documents added by the Surveyor or TA.

The list of supporting documents shows:
- document type
- file name
- any notes added by the surveyor or the TA. If the note is long, you’ll only be able to see the start of it.
View and download supporting documents
You can:
- view additional information about a supporting document, such as who added it and when, and the last edited date
- view the supporting document on screen
- download a supporting document.
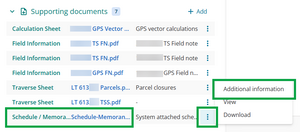
View additional information about a supporting document
Select the 3-dot menu to the right of the document name, then select Additional information.
A popup shows who added and edited the document, and when. Select Dismiss to close the pop-up.


View a supporting document on screen
Select the 3-dot menu to the right of the document name, then select View.
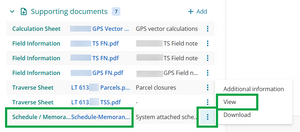
- The document appears in a new tab in your browser.

If the document is TIFF format it appears as a PDF in your browser.
Download a supporting document
Select the 3-dot menu to the right of the document name, then select Download.
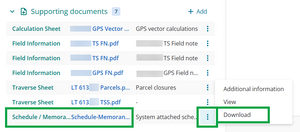
- The document downloads to your usual downloads location on your computer.

Landonline converts some document types from PDF to TIFF when they are uploaded
Some of these converted files are still labelled as PDFs in the supporting documents list.
For files that were converted to TIFF files, if you choose:
- View – the supporting document appears as a PDF in your browser
- Download – the supporting document downloads as a TIFF to your computer.
Add or edit a supporting document
You can add, edit or delete the following 3 types of supporting documents:
- TA correspondence
- Territorial Authority (TA) Certificate
- Territorial Authority (TA) Certification Plan Image.
Add a supporting document
Supporting documents can be PDF, JPG or TIFF file format.
Maximum file size is 10MB.
Select the + Add button.

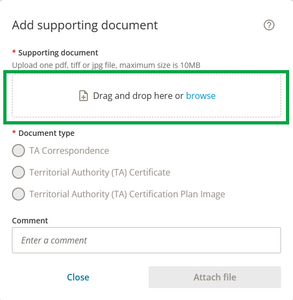
The Add supporting document panel appears. You can either:
- drag and drop your file into the box at the top of the panel
- browse and locate the file within your computer’s file system. Select Browse.
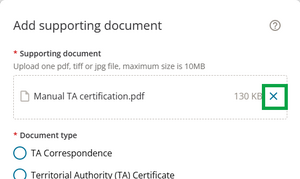
Your file appears in the panel. Select X next to the file name if you need to remove it.
Select the correct Document type. This is required.

Click into the Comment field to add a comment. This is optional. There’s no limit to how much you can write, but only a short section of it will be visible in the TA work item screen.
Note: A hover-over is coming in the future which will allow you to see the whole comment.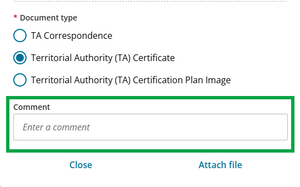
Select Attach file.
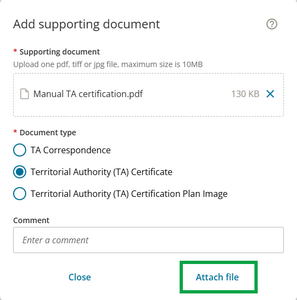
The file you’ve added appears in the list of Supporting documents.


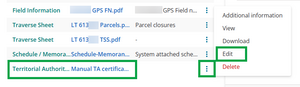
Edit a supporting document
Select the 3-dot menu to the right of the document name, then select Edit.
The Edit supporting document panel appears. You can:
- select X to delete then replace the existing file. For help with uploading a new file, see:
Add a supporting document - change the Document type
- Add, edit, or delete a Comment.
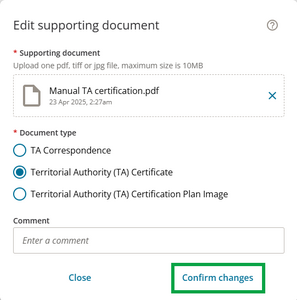
- select X to delete then replace the existing file. For help with uploading a new file, see:
- Select Confirm changes to make your changes.


Delete a supporting document
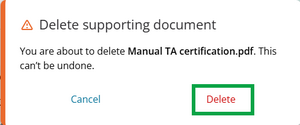
Select the 3-dot menu to the right of the document name, then select Delete.
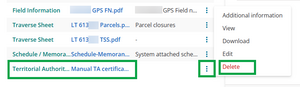
A warning message appears. Select Delete to delete the supporting document. This is irreversible – you will need to re-add the supporting document if you delete it accidentally.


Access current survey LandXML file, Title Plan, and Record of Survey
From the work item details screen, you can:
- regenerate and download the current LandXML file for the survey
- view and download the most recently generated Title Plan and Record of Survey.
Regenerate and download LandXML file
Select the XML icon to the right of the CSD reference number at the top of the screen.

- A LandXML file of the survey in its current state is regenerated and downloaded to your computer. You will find this in your usual download location.

View, download, and print Title Plan and Record of Survey
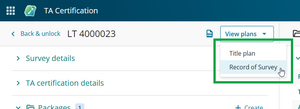
Select View plans to the right of the CSD reference number at the top of the screen.

Select Title Plan or Record of Survey from the dropdown menu. In this example we will select Record of Survey.
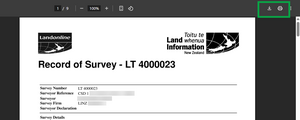
A PDF of the selected survey plan opens in a new browser tab. To download or print the file, select the Download or Print icons on the top right-hand side of the screen.


If a surveyor regenerates the Record of Survey and Title Plan
The LandXML, Record of Survey, and Title Plan you access from the work item screen will often be the same versions as those attached to the notification message you received from the Surveyor.
However, if the surveyor regenerates the Record of Survey and Title Plan without re-notifying you:
- the survey plans in this work item will be the most recently generated versions – they won’t match the attached files in My messages
- the LandXML file will always match the current state of the survey.
If a work item is created by a TA certifier there may not be any plans to view
If a work item has been created by a TA Certifier, rather than being requested by the Surveyor using Landonline, then a Record of Survey and Title Plan may not yet have been generated.
The links to access the Record of Survey and Title Plan under View plans will be greyed out.

Create new work item for a survey when no TA request has been created by the surveyor, or find an existing work item by searching survey number

Use New work item to:
- create a new Landonline TA Certification request (work item) for a Survey.
For example, when a paper-based application for Certification was lodged, but a Landonline TA Certification request hasn’t been created by the surveyor. - find an existing work item by searching by its Survey number.
In some cases, the surveyor may have created the TA certification request and created packages and certificates, but hasn’t sent the request to you yet.
Find a survey and create a new TA certification work item
If your TA receives an application for Certification without the corresponding Landonline TA Certification Request, the Work item for the Survey won’t show in All current work.
You can find the survey and create an equivalent work item through New work item.
Select New work item at the top right of the TA Certification landing page.

An empty Work item opens.

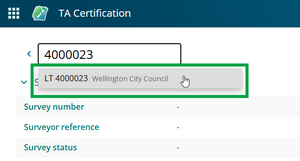
Click on Find a survey number and start typing the survey number in the search box. You don’t need to include the survey prefix, for example LT, SO etc.

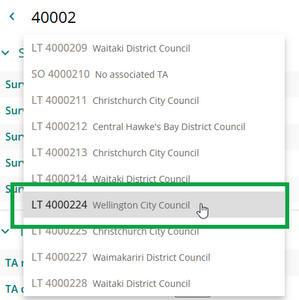
A dropdown menu appears listing surveys matching your input.
- If there’s more than one matching survey, the surveys you can select – related to your TA – are bold.
- The same survey can appear multiple times if it relates to multiple TAs. However you can only select items for your TA.


You can only select surveys related to your TA
Surveys that are not related to your TA are greyed out. If you try to select one of these you’ll see a red “no entry” symbol and a note that you can’t select it.

Left-click on the survey in the list to select it.
A warning shows that Certification is not yet requested. Select Continue to create a new work item for the survey.

The new work item is:
- assigned to you
- filled in with the information about the survey under Survey details
- shown in your My work tab and the All work tab on your landing page.
You can now add a TA reference, create packages and certificates, and add supporting documents as needed.


The surveyor may have created packages and certificates but not sent the TA certification request. In this case, when you select the survey and create the new work item, these packages will also appear in the work item, and you can edit/delete them as required.
See Work with packages and certificates and complete certificates
Use New work item to find and open an existing work item by searching the survey number
If you search for a survey that already has a work item using New work item, the existing work item will be automatically opened. A new work item is not created.
This feature is useful when you want to work on Certifications for a known survey number but you don’t know whether the work item has been created yet in Landonline.
Select New work item. An empty work item screen opens.
Enter the survey number in the Find a survey number search box.
Select the survey from the drop-down list.
- The existing Work item opens and displays its packages, certificates and supporting documents.

If you know a work item exists for the survey, you can also find it by filter or sort. See:
Finding records