
What to do
Adding a placeholder to an existing boundary
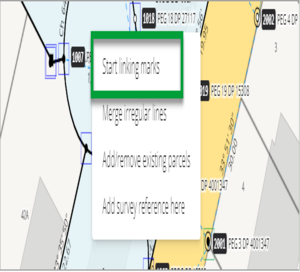
To add a placeholder to an existing boundary, start the mark linking functionality. Right click anywhere in spatial view. This will bring up the context menu. Select Start linking marks.
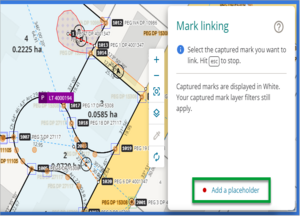
- The mark linking panel will open.
Select Add a placeholder from the bottom of the panel.
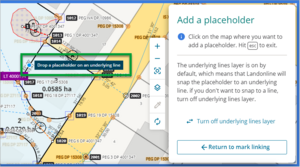
As you move your cursor over spatial view, you will see a message in a green box attached to your cursor telling you to Drop a placeholder on an underlying line.
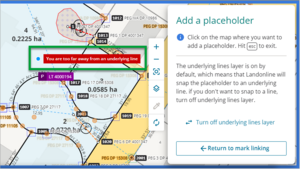
Note: If the location is not on a boundary line you will see a message in a red box attached to your cursor telling you You are too far away from an underlying line.
Left click the position in spatial view for the placeholder. When the desired location is selected, the placeholder will display as a solid red circle.
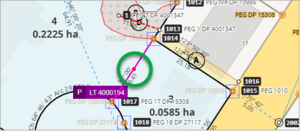
Note: If you click on a straight line or arc, the placeholder will be added on the line at the point you clicked. If you click on an irregular line, the placeholder will be added at the nearest point where the line changes direction.
Once you’ve finished adding placeholders, select Return to mark linking, at the bottom of the Add a placeholder panel, or select the Esc key to return to the Mark linking panel.
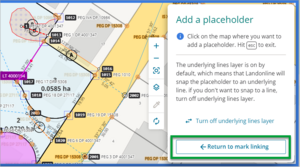
- A captured mark can now be linked to this placeholder, just like linking to an existing mark already in Landonline. See Linking marks using the spatial view for more information.


Adding a placeholder where there is no existing boundary
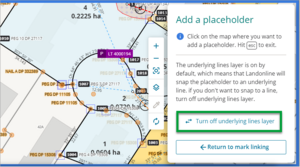
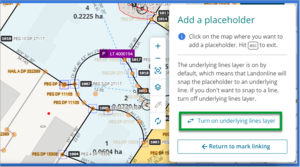
To add a placeholder where there is no existing boundary, start the mark linking functionality, select Add a placeholder and then left click the Turn off the underlying lines layer label.
Left click the position in the Spatial View for the placeholder. The placeholder displays as a solid red circle.
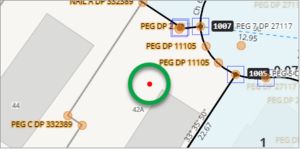
Select Turn on underlying lines layer to return to adding placeholders on boundary lines.
- Once you’ve finished adding placeholders, select Return to mark linking, at the bottom of the Add a placeholder panel, or press the Esc key to return to the Mark linking panel. Press the Esc key again to close the Mark linking panel.


Deleting a placeholder
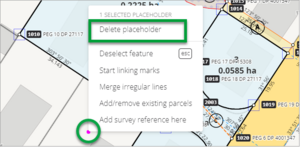
- On the spatial view, right click on the red placeholder symbol to select the placeholder. This will bring up the context menu.
Left click on Delete placeholder.
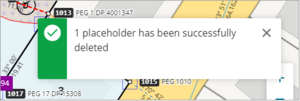
You will momentarily see a pop-up message telling you the placeholder has been successfully deleted.
When you add a placeholder to an existing line, which is in close proximity to another line, make sure you add the placeholder to the correct line.

