If new parcels are added as a LandXML file, use the New parcels panel to edit their textual information (such as parcel appellation), and allocate titles and RT references. Once this is completed, you can link them to Landonline using the spatial view.
What to do
Select the New parcels icon in the left-hand workflow control bar.

- The New parcels panel will display.
- The new parcels imported as part of the LandXML file will auto-populate in the table.
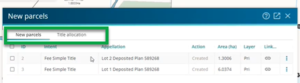
- The New parcels panel has two tabs: New parcels and Title allocation.
- The New parcels tab is used to record the intent, appellation, action, area and layer of the new parcel.
The Title allocation tab is used to add and allocate a title reference to each new parcel.
If you need to add a new parcel, select the + Add new parcel button.
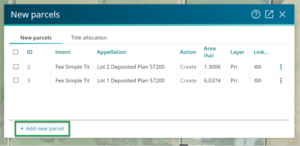
A new row will be added to the bottom of the table below.
- In the New parcels tab, review and edit the information in each field.
The ID column lists the ID number of the parcel.
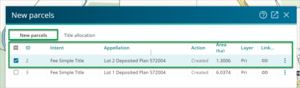
The Intent column has a dropdown list to identify the relevant parcel intent, or you can enter a key word in the search field at the top of the list. See Parcel intent usage for more details.

Double-click the Appellation column to bring up the Edit parcel appellation panel.
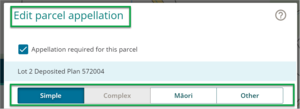
- There is a checkbox at the top of the panel labelled ‘Appellation required for this parcel’.
- If unchecked, the page will grey out, and you can select the Save appellation button at the bottom of the panel.
- If checked, you must enter information under the relevant tab – Simple, Complex (greyed out), Māori land, or Other. See Parcel appellation for further details.
The Simple tab is the most commonly used tab for appellations.
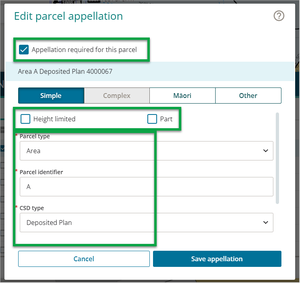
- Height limited – select the checkbox if there is a height limit on the new parcel (this is based on the vertical datum in the Survey details panel).
- Part – select the checkbox if the appellation is part of a block, section or lot. Otherwise, leave this unchecked.
- Parcel type – select from the dropdown list. For example, for a fee simple parcel intent, the options will be (None), Lot or Section.
- Parcel identifier – this is a free text field for you to add your own parcel identifier. Note: Depending on the parcel type selected, this field may accept only numeric characters. Ensure the parcel identifier complies with the Cadastral Survey Rules 2021.
- CSD type – select the appropriate plan type from the dropdown list, such as Deposited Plan (DP).
- CSD reference – this is generally the CSD number for the survey.
- Select the Save appellation button at the bottom of the panel to save your information, or select Cancel to close the panel without saving any information you entered.
- The Complex tab (greyed out in this example) is only editable for residue parcels and is for appellations which are complex, such as historic parcel types. Only use a Complex format for retaining balance parcel appellations.
The Māori tab is for Māori land which has separate appellations, which need to be approved by the Māori Land Court.
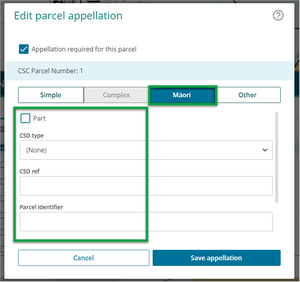
- Part – select the checkbox if the appellation is part of a block, section or lot. Otherwise, leave it unchecked.
- CSD type – select from the dropdown list.
- CSD reference – this is generally the CSD number for the survey.
- Parcel identifier – this is a free text field for you to add a parcel identifier. The identifier will be dictated by the Māori Land Court.
- Name of block – this is the only compulsory field for this type of appellation. Type in the name of the block.
- Select the Save appellation button at the bottom of the panel to save your information, or select Cancel to close the panel without saving your information.
The Other tab is for different scenarios, such as a different type of dataset and a more complex appellation that doesn't fit under the other tabs.
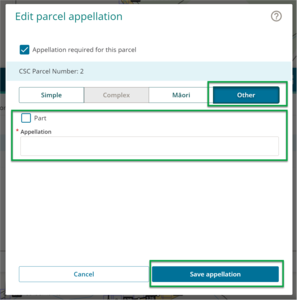
- Part – select the checkbox if the appellation is part of a block. Otherwise, leave it unchecked.
- Appellation – enter text into this field.
- Select the Save appellation button at the bottom of the panel to save your information, or select Cancel to close the panel without saving your information.
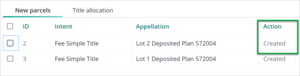
Action – this field will be automatically updated with Created, as it is a new parcel.
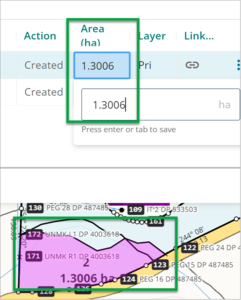
Area (ha) – double-click into the field and review/update the area of the parcel. If you change this figure it will also update on the spatial view.
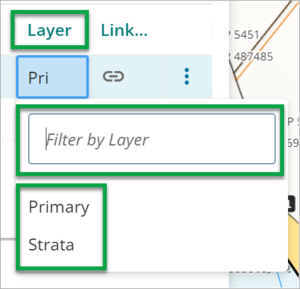
Layer – select from the dropdown list. This list will change depending on the intent of the parcel. For a fee simple title, the options are primary and strata. If your parcel has a large number of layers to select from, use the filter to sort them. Note: The list of options is being revised and will be updated to cater for multi-storey situations.
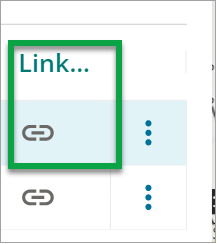
Link – this icon shows if the parcel is linked in Landonline. If it is greyed out with a line through it, it means it is not linked in Landonline. See Link a new parcel.
- You can sort the columns by clicking on a header.
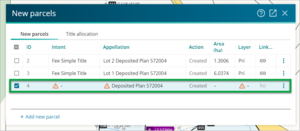
- Select the checkbox on the left-hand side of a row to highlight the new parcel on the spatial view.
- You can highlight one new parcel, or multiple new parcels at once.
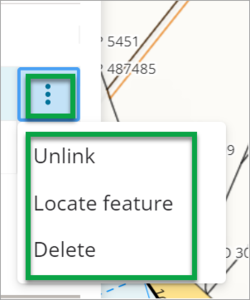
Select the more actions menu (three dots) and then select Locate feature to quickly locate the feature in spatial view.
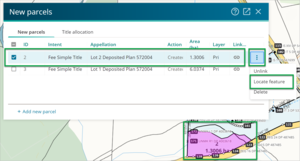
- You can also use the more actions menu (three dots) to:
- Unlink the parcel (if the parcel is already linked), which removes the link to the spatial view of the new parcel.
- Link the parcel (if the parcel is unlinked) on the spatial view.
Delete the new parcel.