
In the following example we have created a table for Memorandum of easements. The process you go through to create a table with a different purpose is the same.
What to do
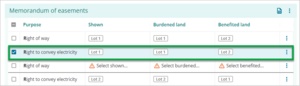
Once you've created the table, select + Add new purpose button.
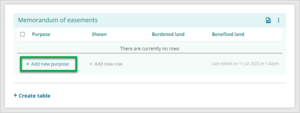
The + Add new row button is greyed out until the table has one existing row.
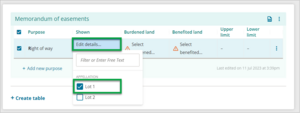
- A row will be added and the list of easement purposes will automatically open.
Select the required easement rights and then select the Enter key, or click anywhere outside the list of easement purposes, to save your selection.

Selecting the Other easement purpose opens a free text field for entering other rights that are not included in the drop-down menu.
You can now start populating the remaining fields. Working left to right along the row, double click, or select the Enter key to start editing a field.
Your changes will save automatically.
For each field, select the appropriate option for your survey.
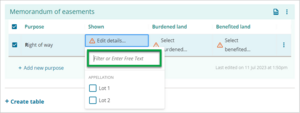
Some of the fields have a filter and free text option, which allows you to narrow down the options that appear. This is useful when a large range of options are available.
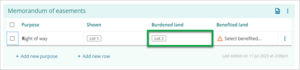
When you select a parcel for the Shown field, the burdened land field may automatically populate with the Primary parcel appellation that the non-primary parcel sits over. This will depend on whether the parcels have already been linked.
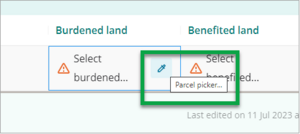
For Burdened land and Benefited land, in addition to selecting the appellation from a drop-down list, you can also select the parcel from spatial view, using the Parcel picker.
5 (a) The drop-down lists are populated by the relevant parcels captured in the Existing parcels or New parcels panels.
For example; to have an abutting parcel appear in the table as a benefited party, capture that abutting parcel as a Referenced parcel in the Existing parcels panel.
This abutting parcel can remain in the dataset as a Referenced parcel, and does not need to be deleted from the dataset even after the parcel has been selected in the Schedule / Memorandum.
If the abutting parcel is not land under survey, the title reference for the abutting parcel does not need to be captured in the Estate records tab.
5 (b) Select the Parcel picker icon. The Schedule/memorandum panel will drop behind the spatial view and you can select the parcel from spatial view.
Select the parcel, then select the Continue button.
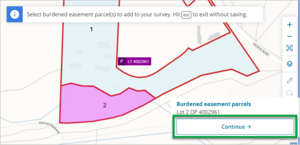
The parcel will be added to the table.
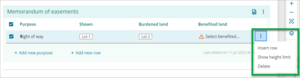
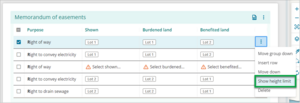
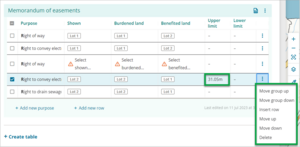
Each row has a three-dot menu to display more options.
The options you see here will vary depending on the type of schedule/memorandum you are working with.
When you have more than one row, you will get additional options.
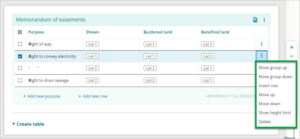
Move group up will move the rows with a common purpose above another group.
Before: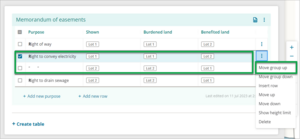
After:
Where the group is at the bottom of the table, there will be no option shown to Move group down.
Move group down will move the rows with a common purpose below another group.
Before:
After:
Where the group is at the top of the table, there will be no option shown to Move group up.
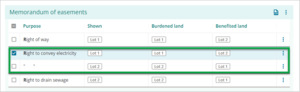
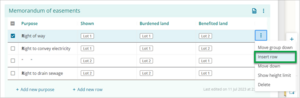
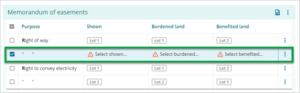
Insert row creates a new row below the selected row and with the purpose copied from the row above (displayed as quotation marks (“ “) focused & open ready for data capture on next available field after the purpose.
Before:
After:
If there is a row in the group the row is being moved to that does not have the details completed, the row you are moving will be placed above it.
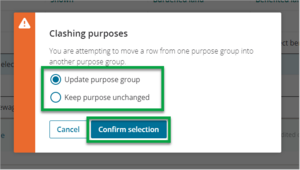
Move up will move the row up one row. When the row above has a different easement purpose a warning box will ask whether you want to Update purpose group or Keep purpose unchanged.
Before updating group purpose: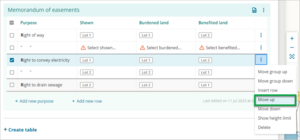
Changing purpose warning:
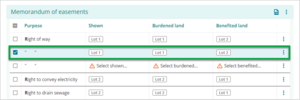
After updating purpose group:
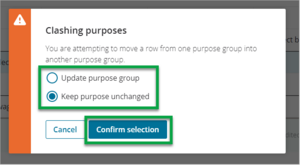
Keeping purpose unchanged warning:
After keeping purpose unchanged:
If there is a row in the group the row is being moved to that does not have the details completed, the row you are moving will be placed above it.
- Move down will move the row down one row. When the row above has a different easement purpose a warning box will ask whether you want to Update purpose group or Keep purpose unchanged, with similar results to Move up.
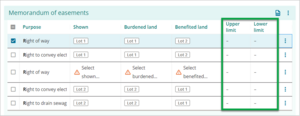
Show Height Limited shows the Upper and Lower limit columns, allowing upper of lower height limit values to be entered. Select the three-dot menu and then select Show height limit.
Upper and lower height limit columns will be added to the table.
When the Upper and Lower limit columns are displayed, and there are no values in those columns, an option to Hide height limit is available in the 3-dot menu. Select this to hide the columns.
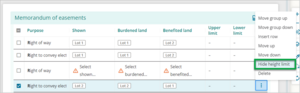
If there is a value in the Upper or Lower limit column, the Hide height limit option is not available.
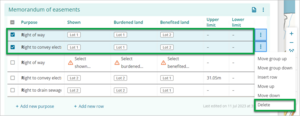
Delete will delete the selected row or rows.
- Continue to add a new purpose and rows as needed.
- Add new purpose button will add a new row and the list of easement purposes will automatically appear for you to select a new easement right.
Add new row button will add a new row with the same purpose as the row immediately above.


